Introduction:
As modern applications increasingly cater to customers and partners outside their organization, identity management needs to be both secure and seamless. Microsoft Entra External ID simplifies customer identity and access management (CIAM) by providing prebuilt User Flows—configurable policies for sign-up, sign-in, profile editing, and password reset experiences. These no-code flows are ideal for developers who want to quickly integrate secure authentication into their applications without the complexity of writing custom policies.
In this article, we’ll explore what user flows are in Microsoft Entra External ID, how to create and test them using the Entra admin center.
What Are User Flows in Microsoft Entra External ID?
User Flows are predefined and configurable identity experiences in Microsoft Entra External ID. They allow you to control how external users register, sign in, reset their passwords, or update their profiles—all through a guided configuration process.
Typical user flows include:
- Sign up and sign in
- Password reset
- Edit profile
- Sign-in only
- Sign-up only
Each flow defines how information is collected, what identity providers are used (email, phone, Google, etc.), and how claims are returned to your app.
Creating a User Flow in the Entra Admin Center
Step 1: Sign In to the Admin Center
- Navigate to Microsoft Entra Admin Center
- Make sure you’ve selected your External ID tenant
Step 2: Create a New User Flow
- Go to External identities > User flows
- Click + New user flow, as shown in the figure below
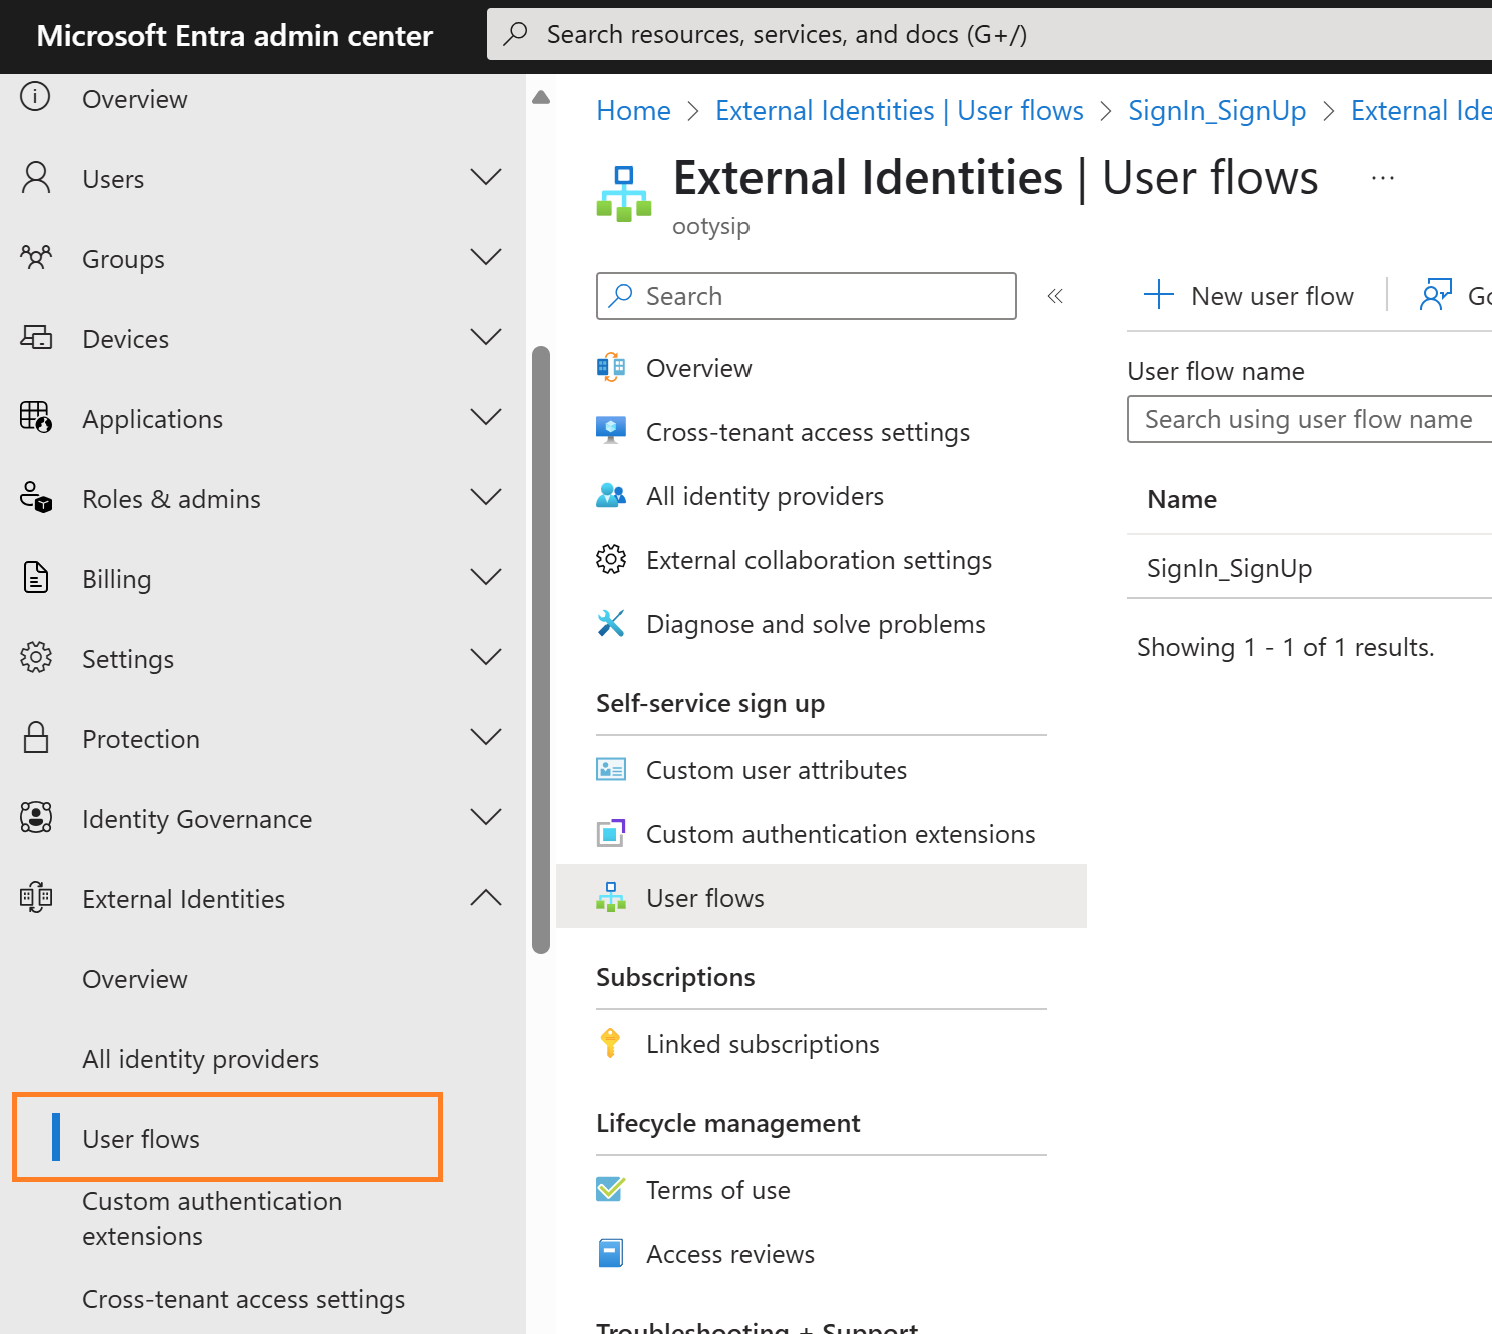
- Provide a name for the flow (e.g., SignUp_SignIn)
- Configurations:
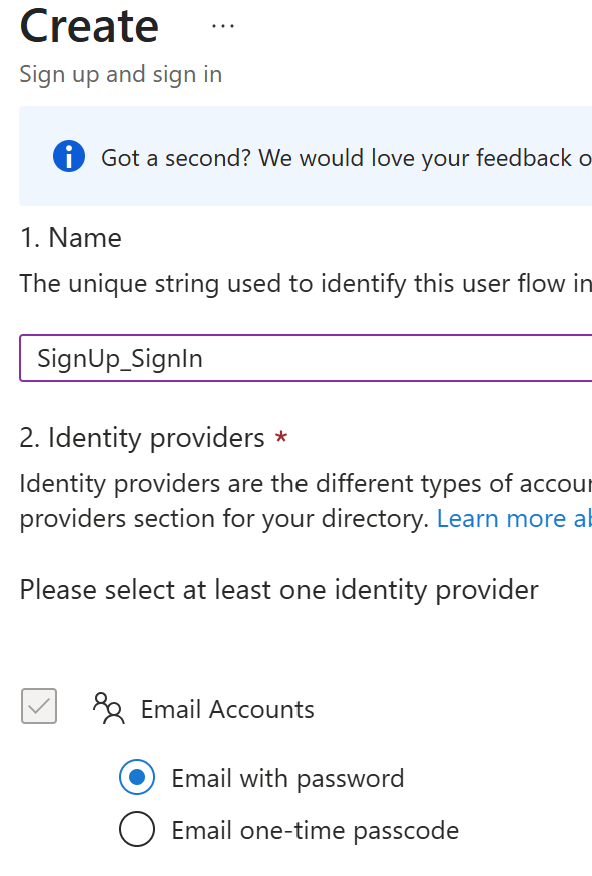
- Identity providers
Right now, I have an Email Account. If you add other Identity providers like Google or Facebook, it will list here for the selection. For a demo, I just went with an email witha password - User attributes
To collect the user information on Sign Up, click on Show more to get more fields for the selection. For a demo, I just selected Email Address, Given Name and Surname.
- Identity providers
Step 3: Register Entra ID Application
- Go to Applications -> App Registrations
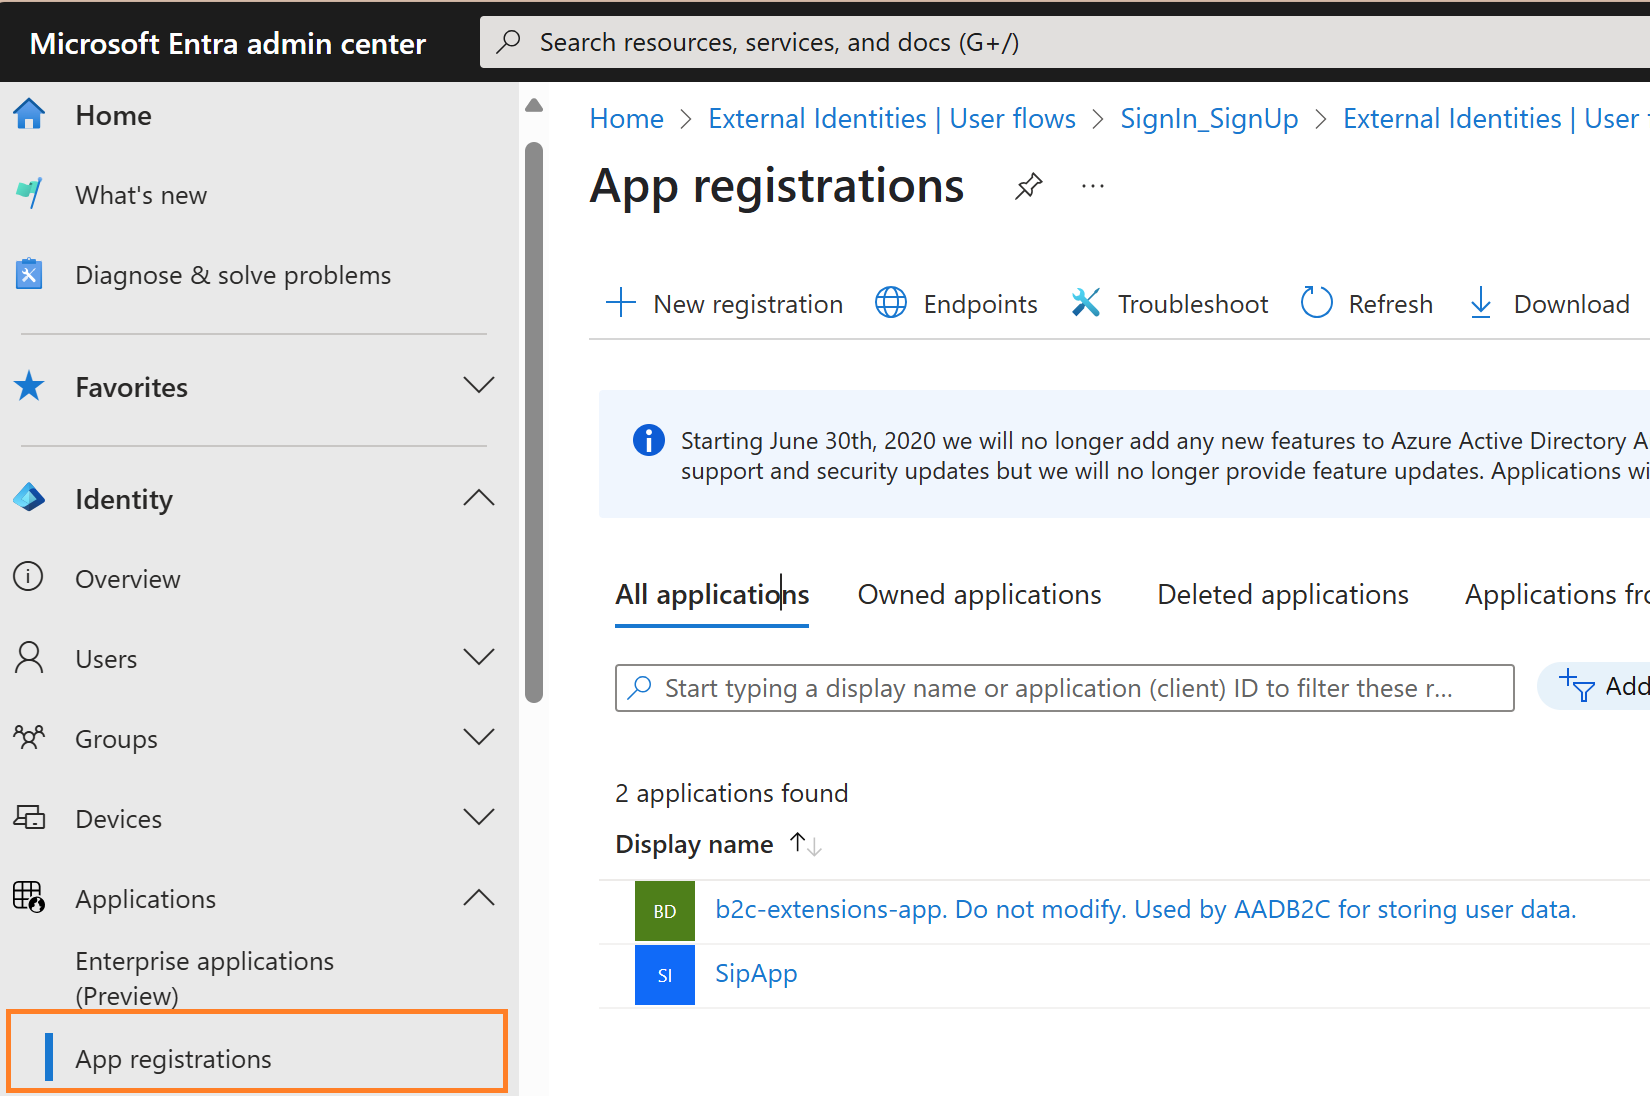
- By default, you can see the app “b2c-extensions-app. Do not modify. Used by AADB2C for storing user data.” Which is created upon creation of the tenant, as the name suggests, this app is used to store the user data and for Authentication.
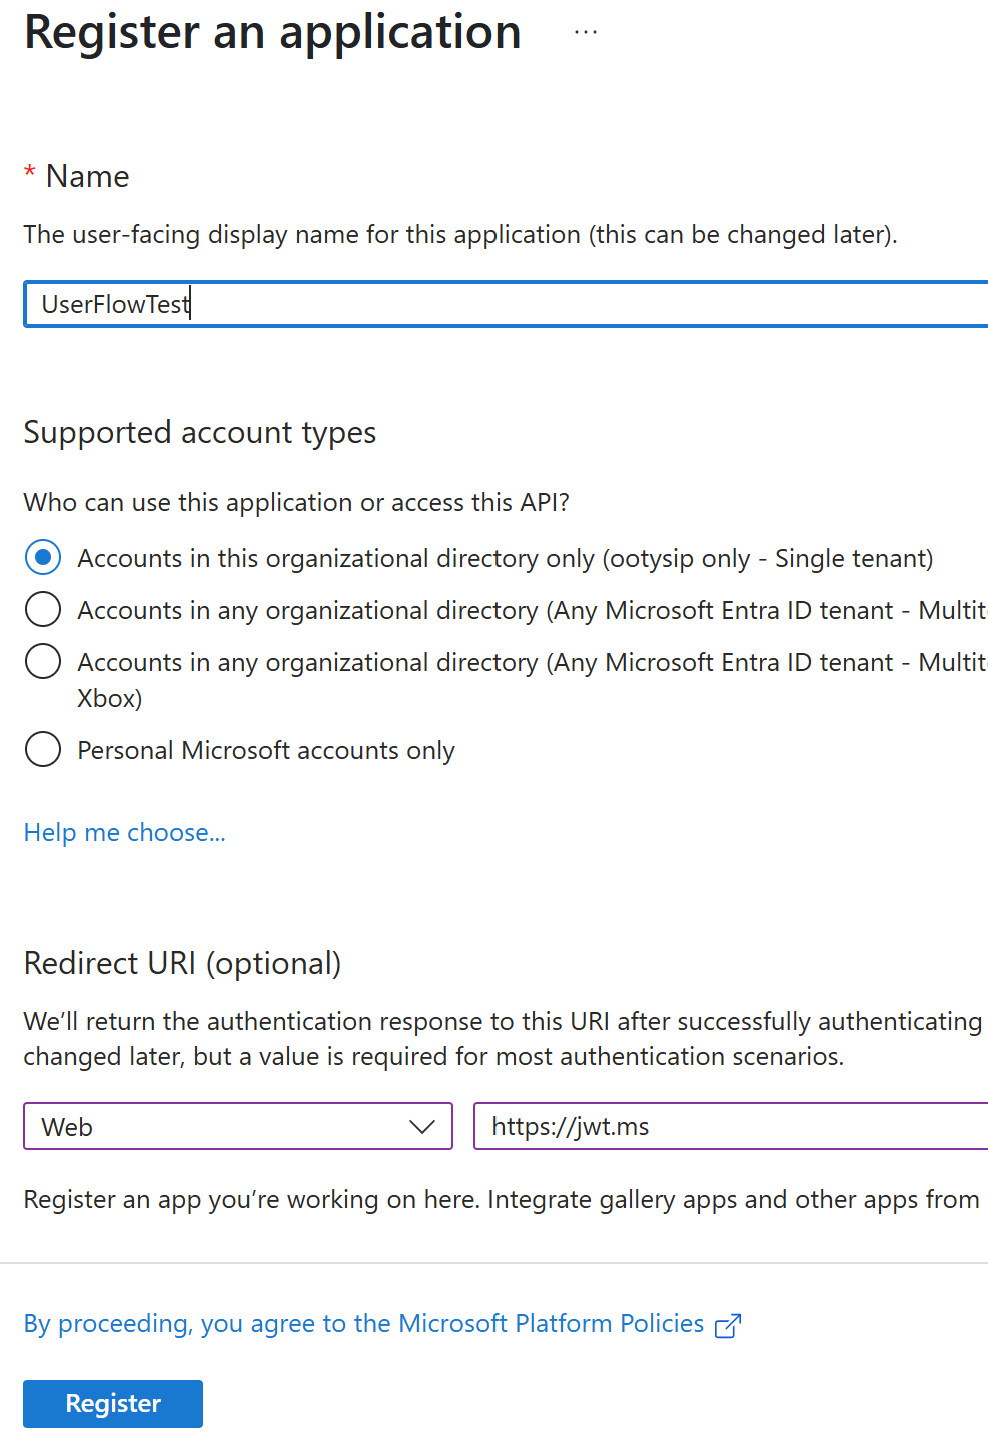
- Let’s register a new application. Click on the new registration button
- Name your application, select a platform as web, and add a redirect URI as htts://jwt.ms
- After the app creation, switch to API Permissions options and Grant Admin consent

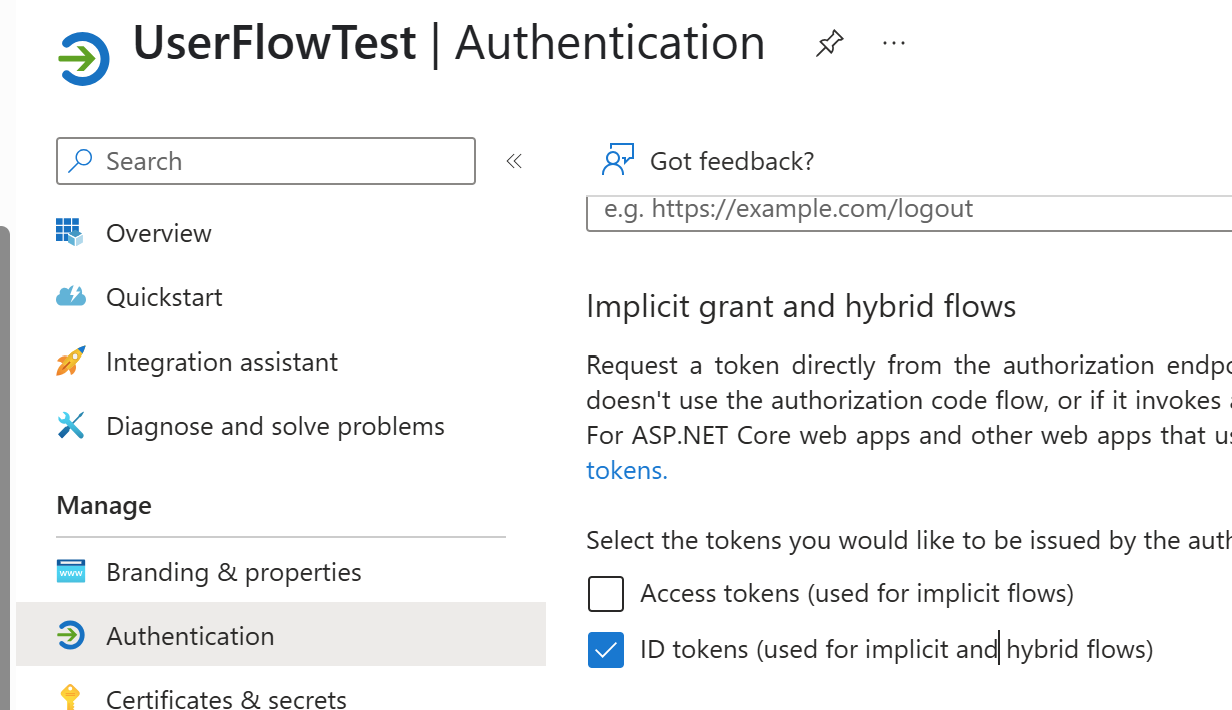
- Select Authentication from the Manage Blade and check ID tokens, and save the configuration.
Step 4: User Flow Test
- Switch back to the user flow screen
- Select the user flow
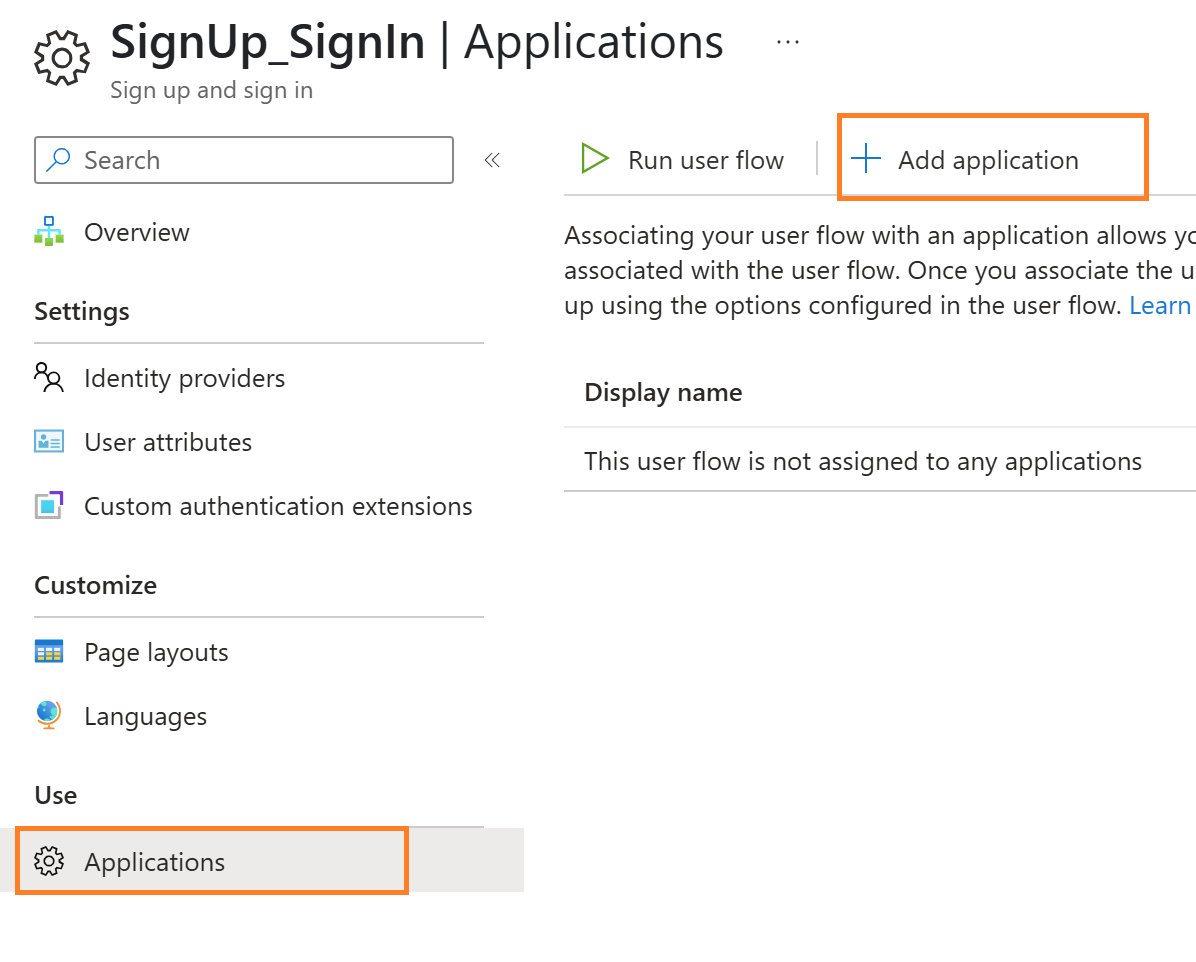
- Link the application to test the user flow, select Applications under Use Blade, click on Add application, and link the application
- Click on Run user flow, and you will get an OpenID Configuration endpoint and wizard to run the user flow. Click on Run user flow

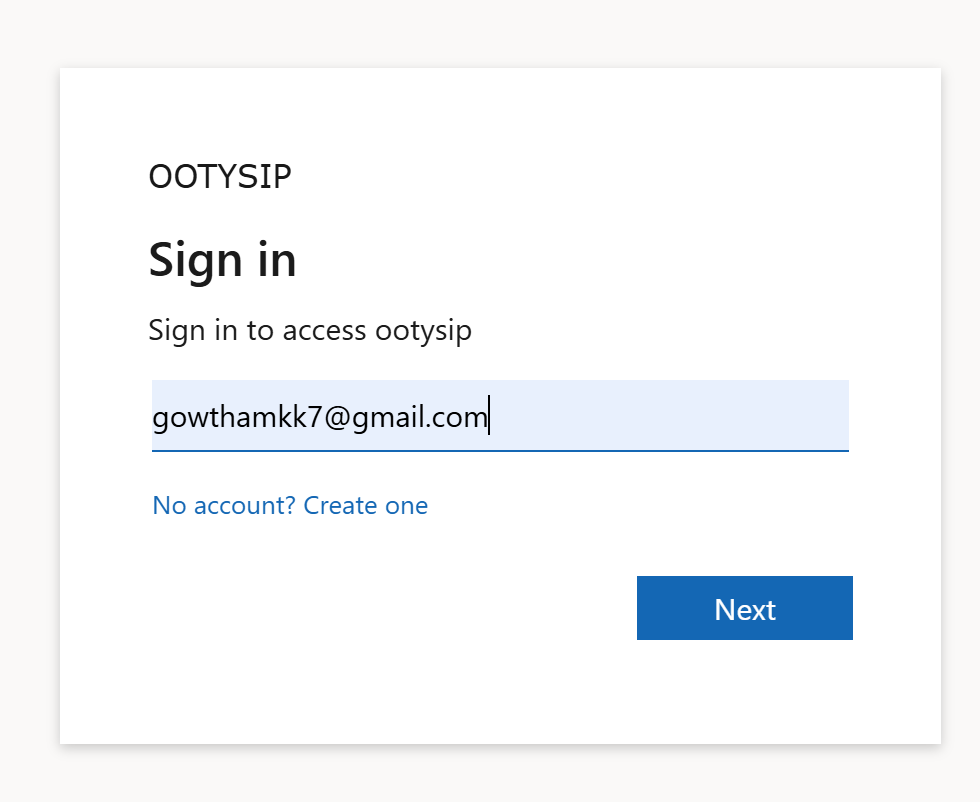
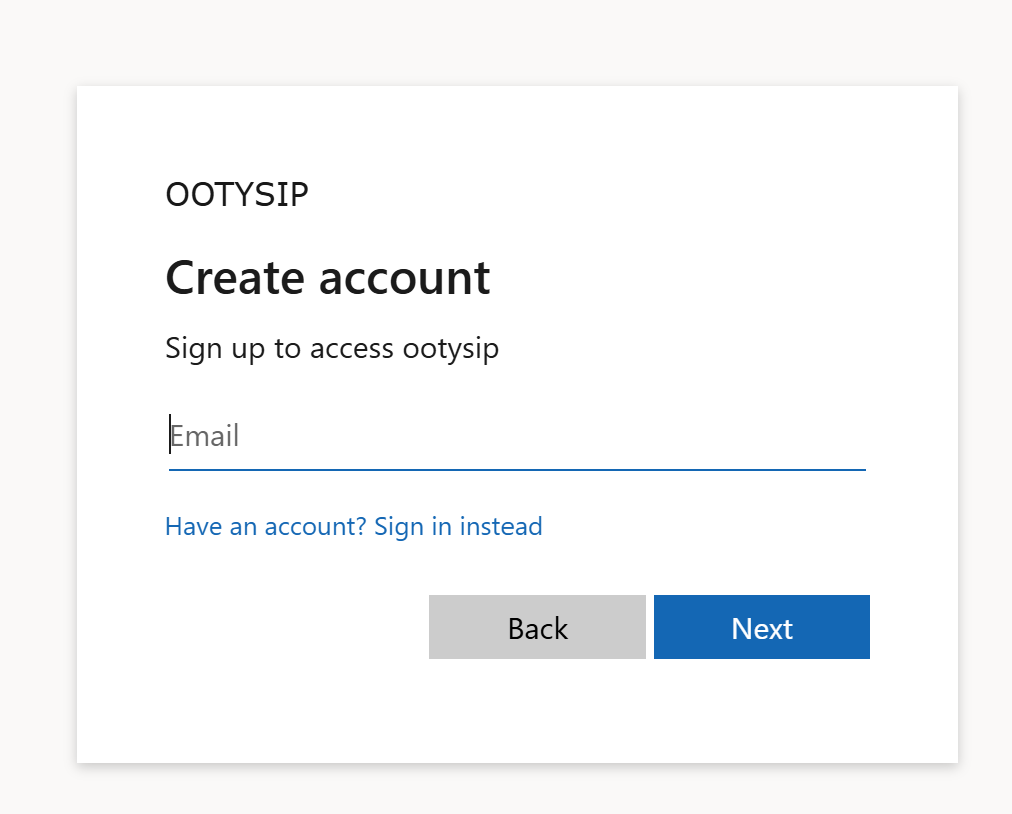
- First, you will get a Sign In screen, and you can navigate to Sign up by clicking create, as shown in the figures below.
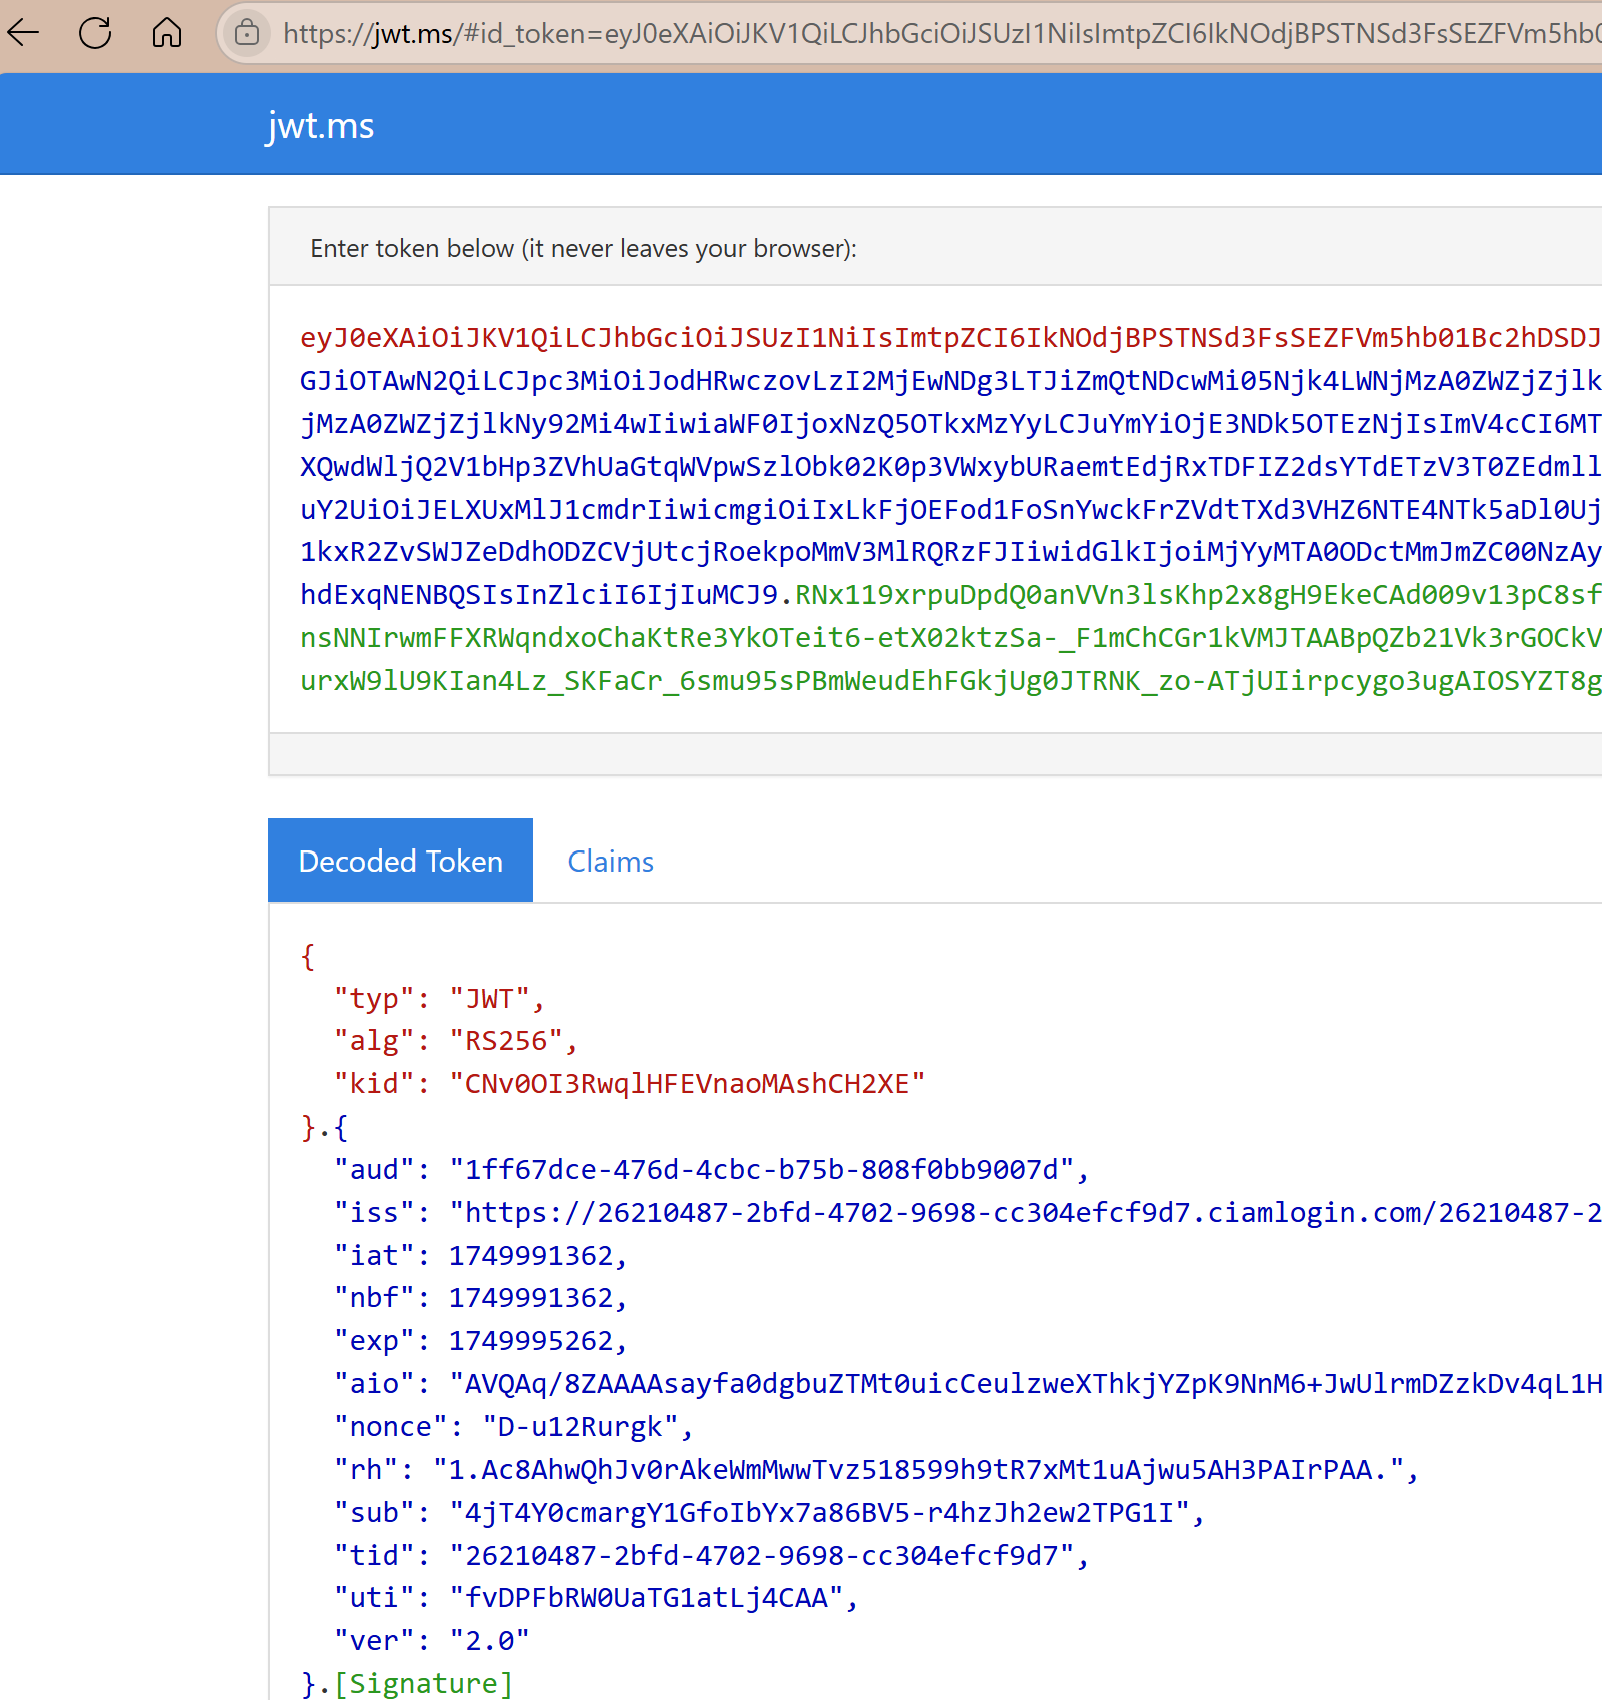
- Once you complete the authentication it will redirect to jwt.ms which will decode the ID token to extract the claims
Summary:
Microsoft Entra External ID offers a powerful and simple way to manage customer identities with built-in User Flows that require no code to set up. In this article, we demonstrated how to create and test these user flows using the Entra admin center. This approach accelerates secure authentication without any complexity.
Stay tuned for upcoming articles, I’ll cover topics like custom branding, linking external identity providers (like Google and Facebook), and implementing custom policies using REST APIs within Entra External ID.

Leave a Reply