Introduction
Single Sign-On (SSO) is a powerful feature that enhances security and streamlines user access across multiple applications. Microsoft Entra ID provides robust support for SSO, enabling organizations to integrate and manage identity across a wide range of apps. In this blog, I delve into configuring attributes and claims for Entra ID SSO applications, detailing how you can customize and map user information to meet your specific requirements. From understanding the fundamentals of claims to configuring advanced attribute mappings, this guide offers a comprehensive overview to help you optimize your SSO setup and enhance the user experience.
Pre-requisites
- Microsoft Entra ID
- Visual Studio /VS Code for web application development
Microsoft Entra ID Application
Please refer to my article on Microsoft Entra ID Integration with .NET 8 ASP.NET Core Application (c-sharpcorner.com) to register the Entra ID application and Integrate the identity Platform with .NET 8 Web application.
Login to entra.microsoft.com as an application admin or a global admin.
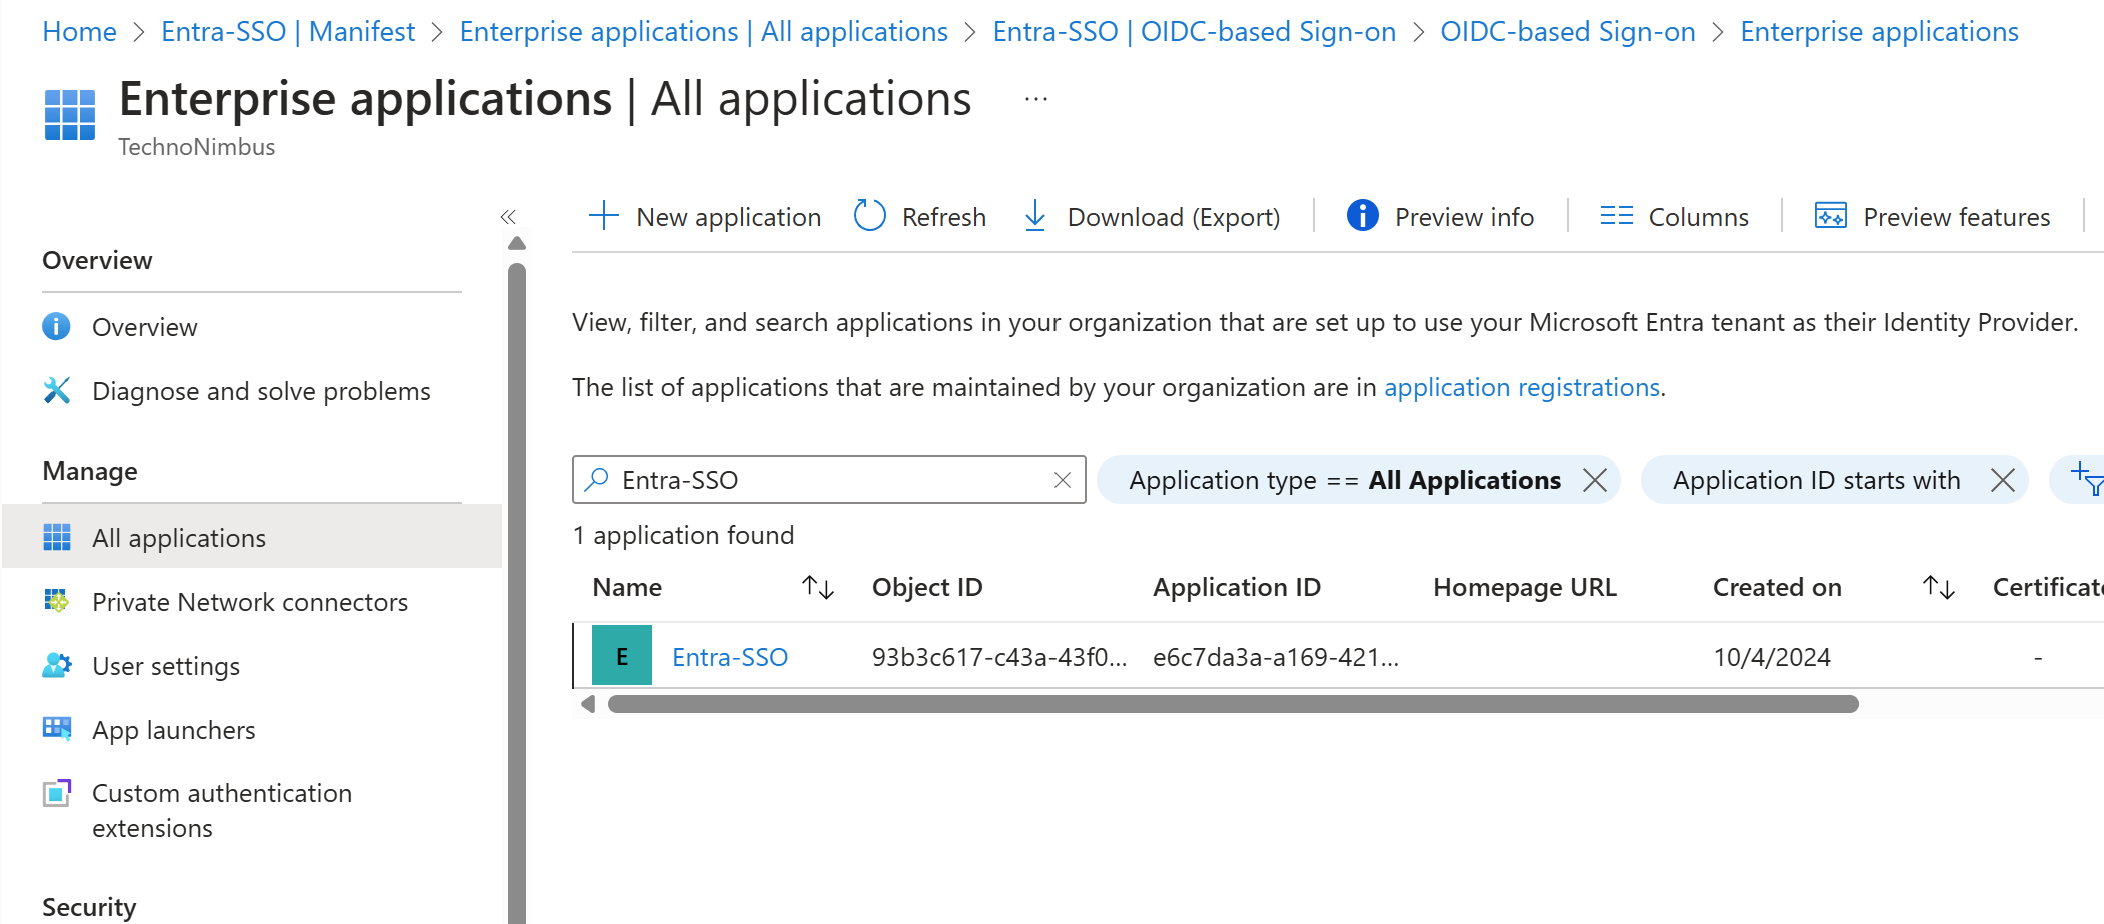
Go to the Enterprise application and ensure you search for all applications as shown in the below figure and select the registered application, In my case it is Entra-SSO.
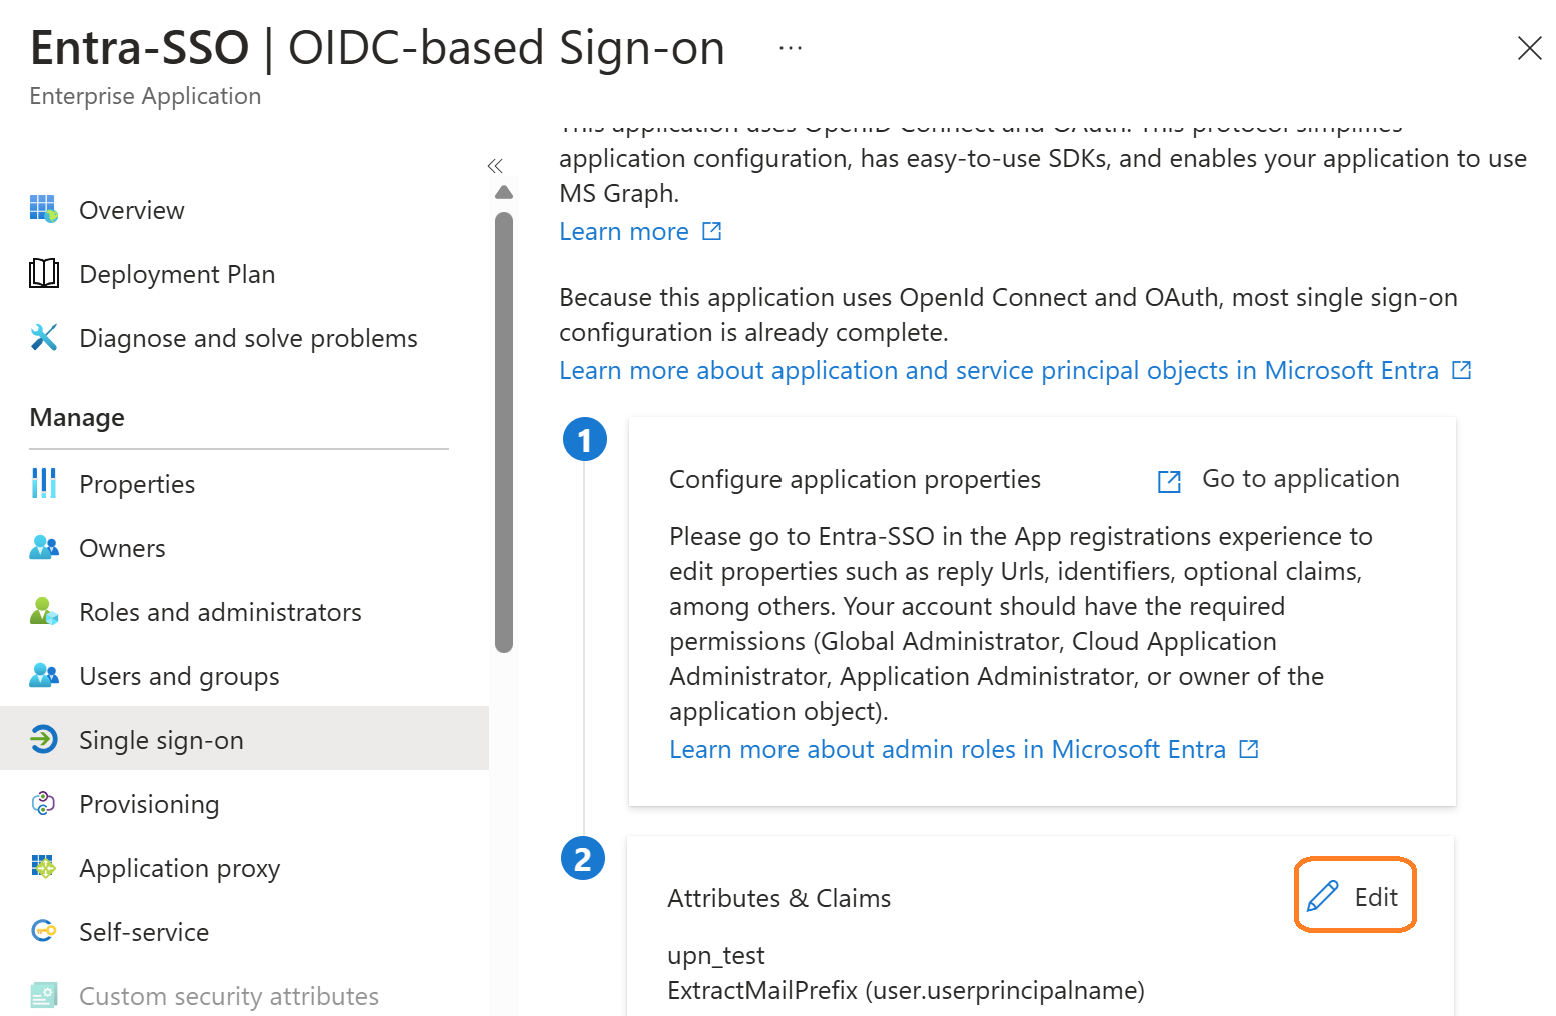
Go to Single Sign-On under Manage section
Click on Edit icon in Attributes & Claims
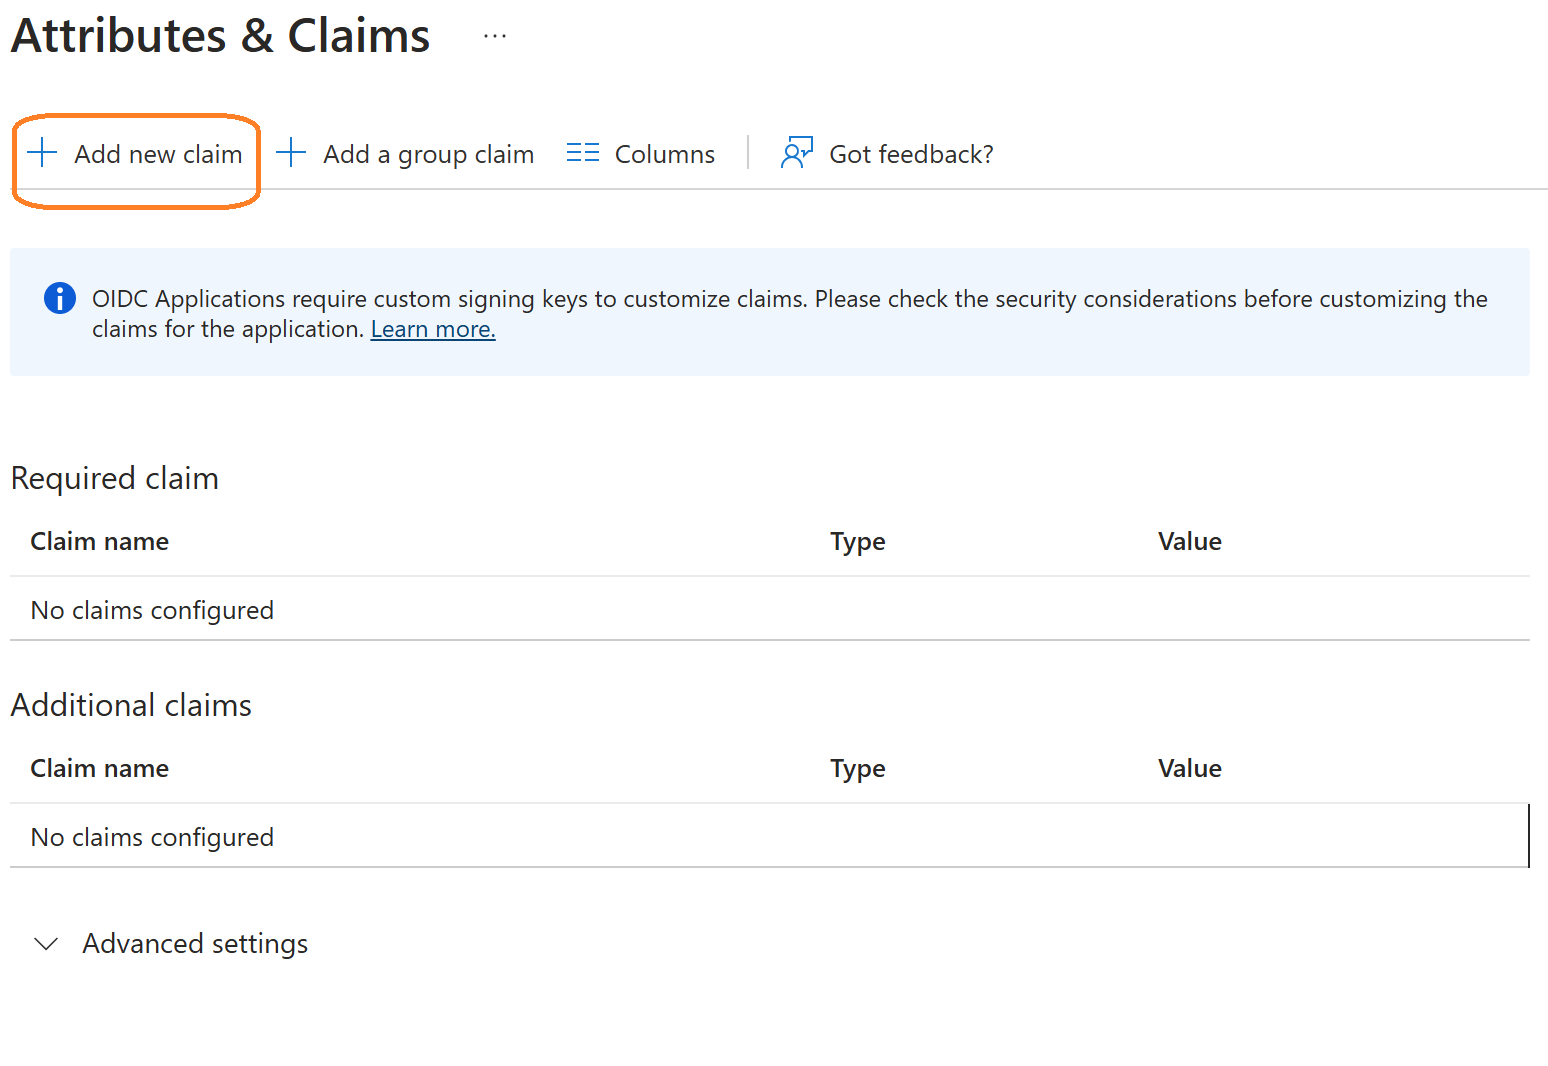
Click on Add new claim
Provide the Claim name. In my case I named it as upn_test
Under Choose name format section select transformation
Select ExtractMailPrefix() function from Transformation field, select Attribute from Parameter 1 field, select user.userprincipalname from the Attribute name field and click on Add.
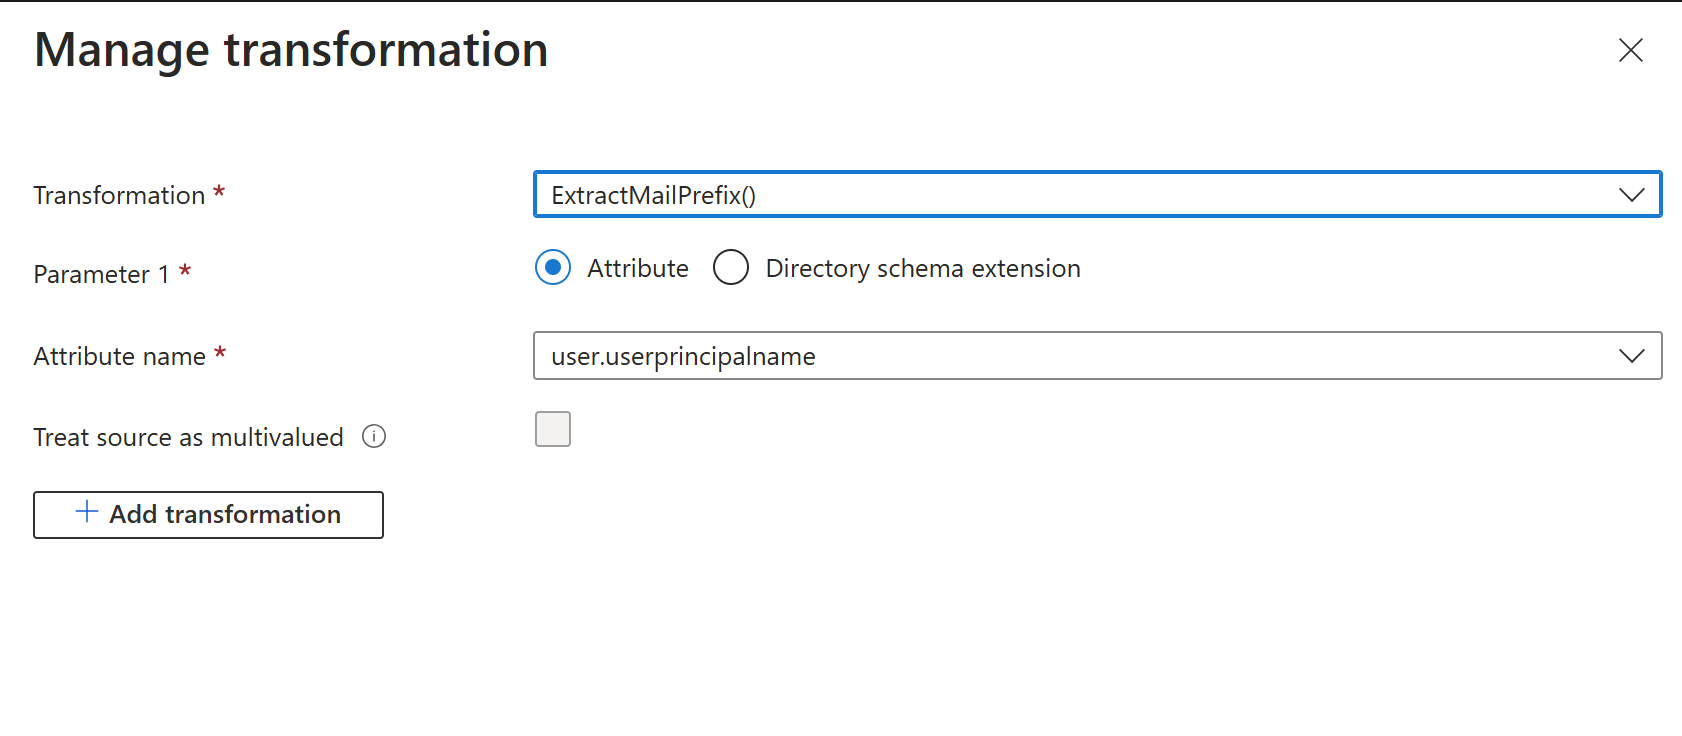
- ExtractMailPrefix – This function will extract the local part of the email address, For example, if the user.userprincipalname is foo@gmail.com results in output claim upn_test will be “foo”. If no @ sign is present, then the original input string is returned.
- Save the changes
Run the web application
I did some changes in the HomeController Index action and respective view in the source code to render all the claims from the token. Get an entire source code from my GitHub repo.

Exception: “This application is required to be configured with an application-specific signing key.”
You will get the above exception message, immediately after completing the Microsoft Entra ID SSO Login.
To resolve this exception, you must set acceptMappedClaims to true from the application manifest. Login to entra.microsoft.com as an application admin,
Go to All Applications, search your registered application, and click the manifest option from the manage blade, click AAD Graph App Manifest edit the file, and set “acceptMappedClaims” to true.
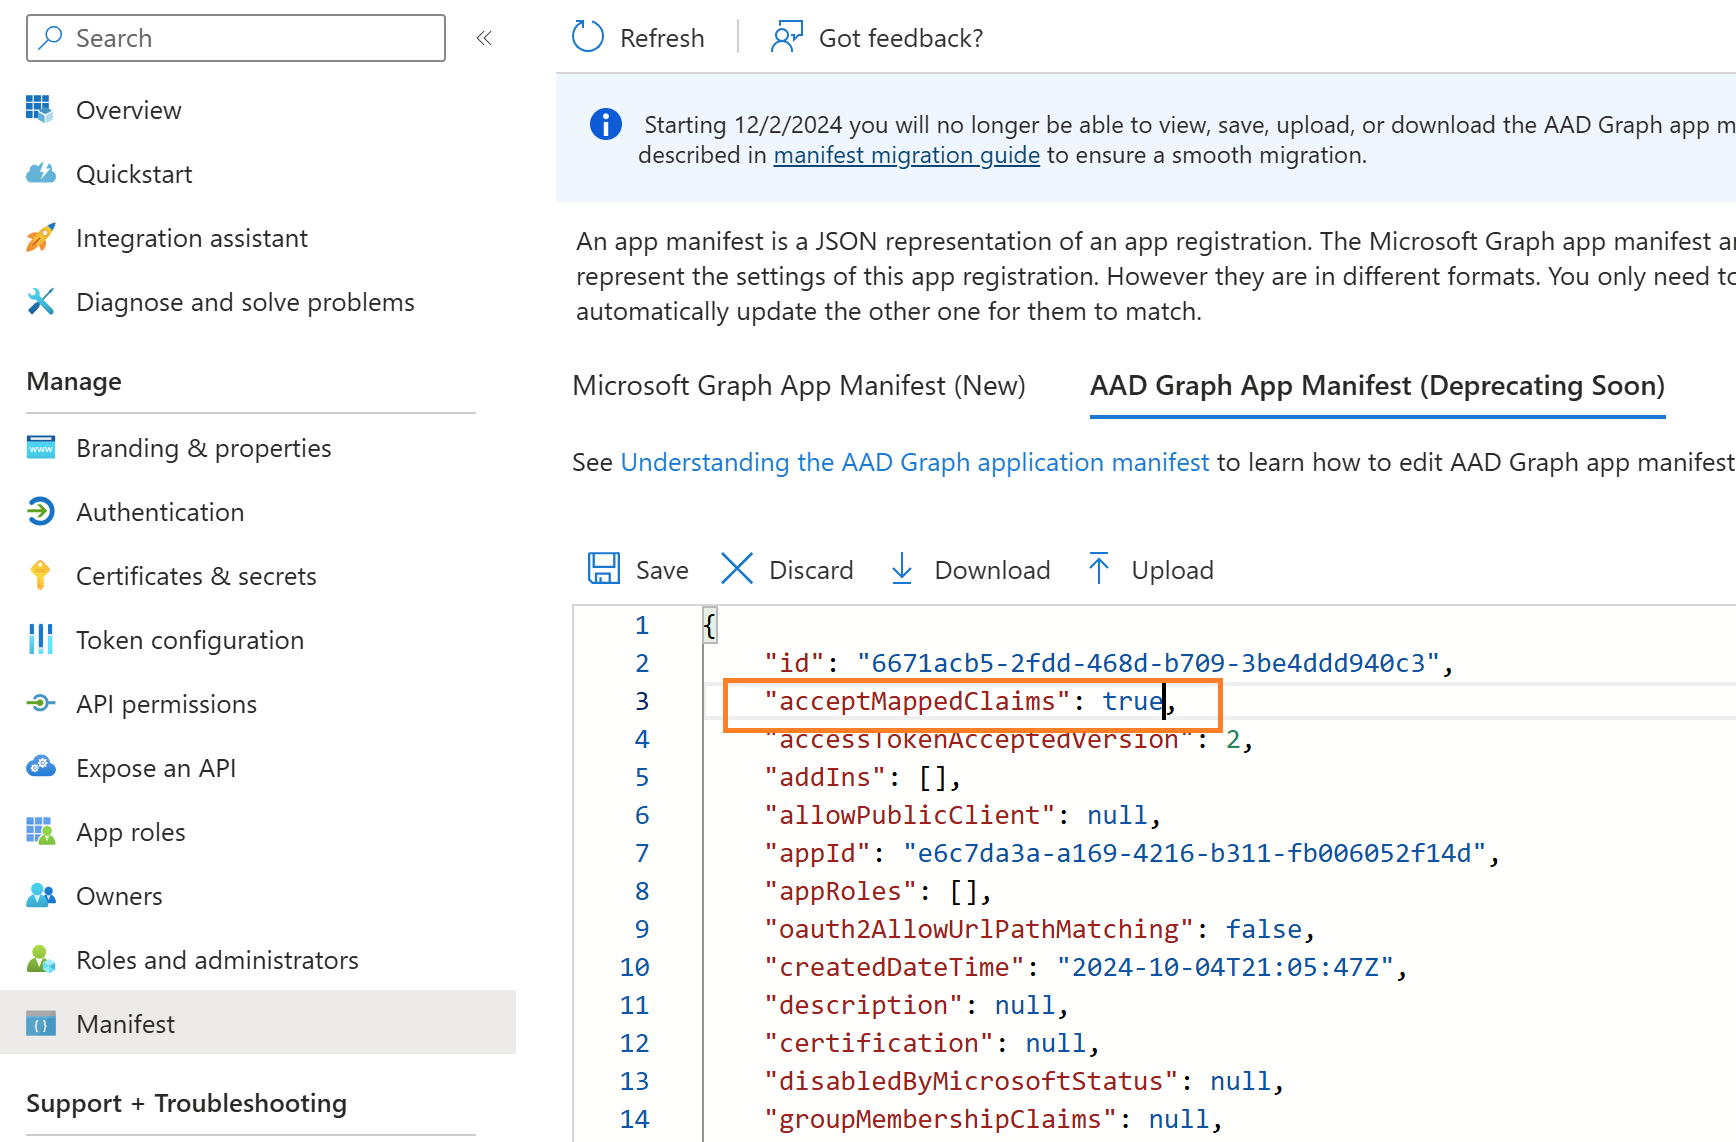
Now, run the web application, and you can see the custom claim attribute “upn_test” in the claims list
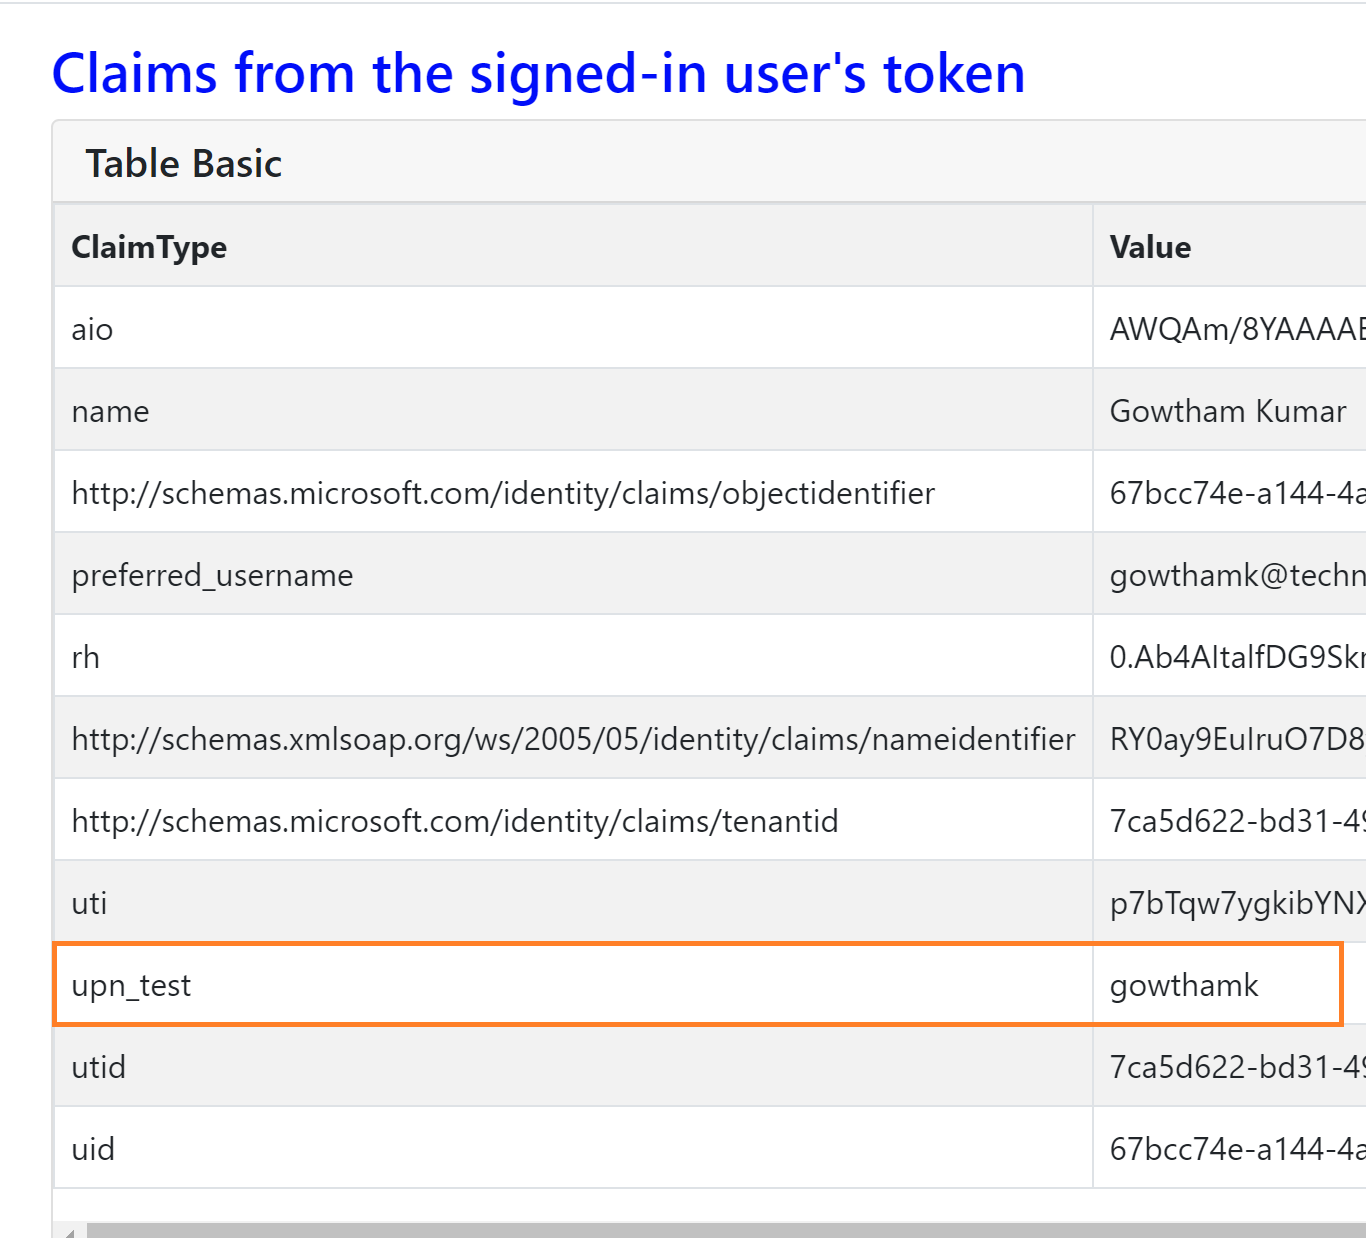
From the above screenshot, you can observe as per our expectation the custom claim upn_test holds a value gowthamk which is the local part of the email address.
Summary
In this blog, we explore how to configure custom claims for Entra ID Single Sign-On (SSO) applications. Custom claims allow organizations to tailor the information passed in SSO tokens, ensuring that applications receive the necessary user attributes for authorization and personalization. This guide covers the process of creating and managing custom claims in Entra ID, including setting up attribute mappings, customizing token output, and troubleshooting common configuration issues. By the end of this blog, you’ll have the knowledge to optimize your SSO integrations with custom claim configurations that align with your application’s specific needs.
