Introduction
To build and deploy our code or application using a CI/CD pipeline, we need an agent pool in Azure DevOps. This agent is computing infrastructure with all required software pre-installed for the build and deployment. There are four types of agents in Azure DevOps,
- Microsoft hosted agents
- Self-hosted agents
- Azure Virtual Machine Scale Set
- Azure Managed DevOps Pool
Microsoft Hosted agents
As the name implies, Microsoft ultimately maintains these. Your pipeline always uses the latest version of the specified VM image. Each pipeline job runs on a fresh virtual machine, discarded once completed. As a result, any changes made to the virtual machine’s file system during a job, such as code checkout, will not persist with the next job. It has some limitations as well.
Self-hosted agents
We maintain entirely self-hosted agents. These agents provide greater control, allowing you to install the necessary software dependencies for your builds and deployments. Additionally, machine-level caches and configurations persist across runs, potentially improving performance.
We can install the agent on Linux, Windows, macOS, and a Docker container.
Azure Virtual Machine Scale Set
We can create a pool of custom agents based on an Azure Virtual machine scale set hosted in your Azure subscription.
Azure Managed DevOps Pool
Managed DevOps Pools is a fully managed service in which the virtual machines or containers running the agents are hosted in Microsoft’s Azure subscription rather than your Azure subscription, as is the case with Azure DevOps Virtual Machine Scale Set agent pools. It ensures security by implementing the best security practices. It’s an evolution of the Azure DevOps Virtual Machine Scale set.
Benefit from using this service,
- Time – Since it’s a platform as a service and entirely managed by Microsoft, you will save more time managing the CI/CD pipeline infrastructure.
- Scale – It’s scalable up to thousands of agents running simultaneously
- Security – The agents in your pool are secure using Microsoft’s best practices and develop additional features to enhance pool security. We can do Vnet integration for network-level isolation and protection.
This article will show how to create an Azure Managed DevOps pool with Azure and use Azure DevOps to build secure CI/CD pipelines. I will show how we can integrate the Managed DevOps pool within a Vnet to securely build and deploy the application in the Azure Web app, which is restricted to public access with a private link into the same Virtual network.
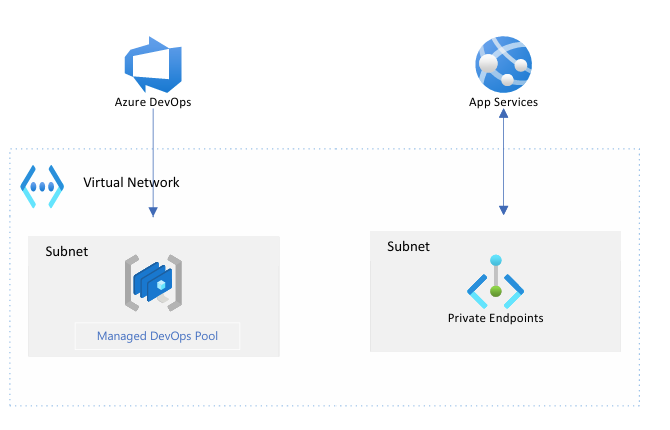
Create an Azure Managed DevOps Pool
Step 1: Log in to the Azure portal, search for Managed DevOps pool, and select the service
Step 2: Click on Create, from Basics section, provide the following information,
- Dev Center instance information – Create a new Dev center if it does not exist
- Provide your Azure DevOps Organization name
- Make sure the pool name is unique
- Provide the maximum number of agents. In my case, I used 1
- Agent Size: select the required size from the available SKUs
- Images: We can pick multiple images to create a CI/CD agent. I user ubuntu image
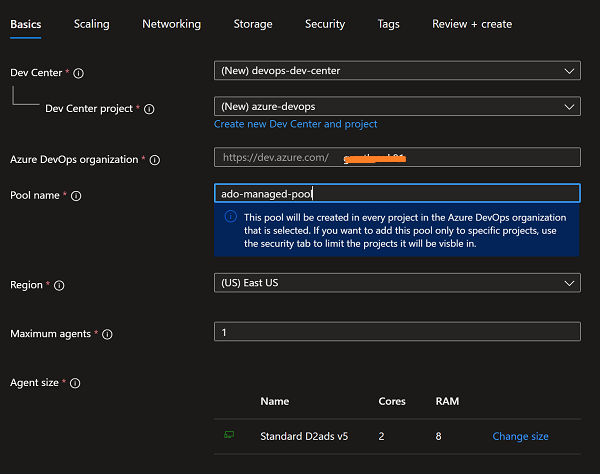

Step 3: Scaling – go with the standard or default settings to keep the cost low
Step 4: Networking – I want to secure and isolate this pool by injecting it into the existing virtual network because I will be using this pool to build and deploy the application which is a highly secured web application that uses Private links and within a network, so both these resources should be in same Virtual Network.
Use an isolated virtual network if you don’t want to integrate with an existing virtual network
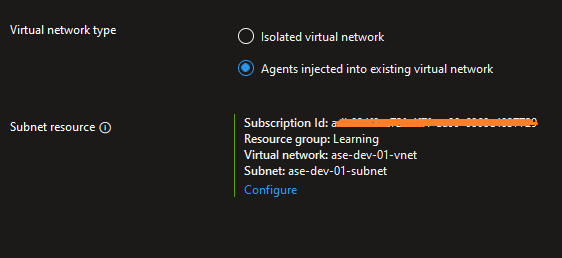
Step 5: Storage – If there is any requirement for storage, you can add an empty data disk
Step 6: Security – Add the Pool administrators here, and you can also configure whether this pool can be used for multiple organizations or single organizations with access to all projects
Step 7: Make sure you add the tags and create the resource.
Azure DevOps Agent Pool
Step 1: Log in to Azure DevOps and hop into the agent pools from organization settings. You can see the newly created Managed DevOps pool listed there.
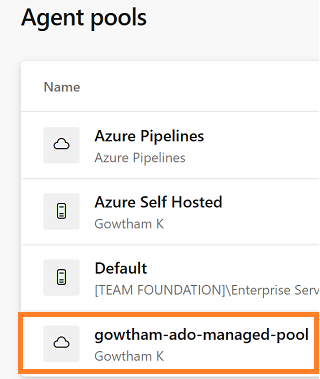
Step 2: Let’s create a pipeline to test the agent pool. I used the below yml to build and publish the.NET application into one of my secured Azure web app.
Get the pipeline yml code here
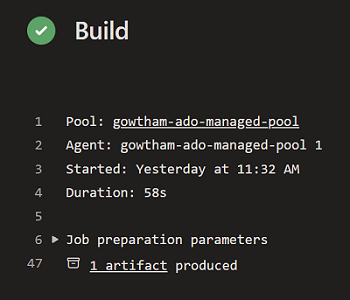
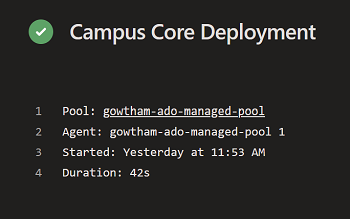
Step 3: Run the pipeline, the below figures show the build and deployment summary
Summary
This article provides a comprehensive guide to configuring a secure CI/CD pipeline in Azure DevOps using Azure Managed DevOps Pools. It introduces Azure Managed DevOps Pools, highlighting benefits such as enhanced security and reduced maintenance overhead. The article then walks through the step-by-step process of setting up a Managed DevOps Pool and concludes by demonstrating the creation of a CI/CD pipeline using agents powered by the Managed DevOps Pool.
Please share your thoughts and comments below.
Happy coding 😊!
Happy Cloud-Building!
